
Have you been thinking of redoing your kitchen? Kitchen renovations can drain your pocketbook quickly with housing experts recommending a remodel budget of 3-8% of the home’s value. This means most renovations cost between $12,500 to $35,000. Most people don’t have an extra $10,000 or $20,000 just lying around, so what is the best way to make the biggest impact in your kitchen?
Your cabinets. Obviously, cabinets are a foundational and essential part of your kitchen but replacing them can cost you around $15,000. Most of the time you can keep your cabinets and update them with paint, some sanding, and new hardware for much less. Let me show you how simply repainting your old cabinetry can transform a drab kitchen into a modern farmhouse dream.
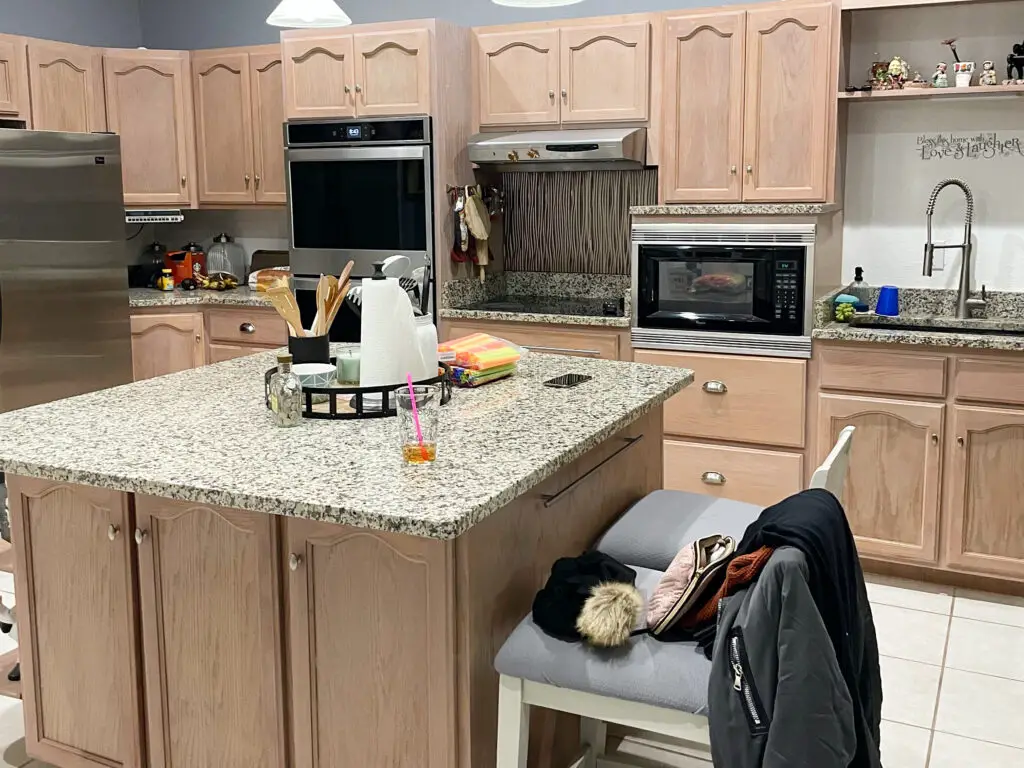
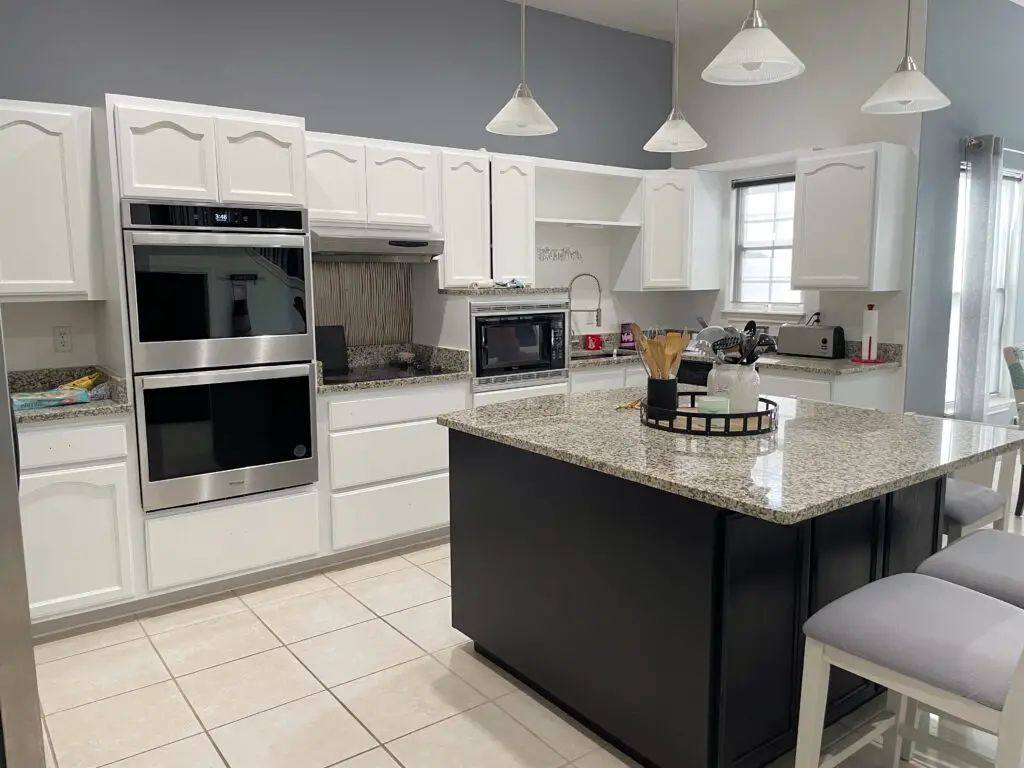
My friend’s 20-year-old kitchen featured a large footprint and functional layout. Unfortunately, the dark counters and all wood-toned cabinetry shrunk the space. The faded weathered cabinetry emitted an almost pink hue after years of sunlight beaming on them. The updated appliances no longer screamed updated kitchen because the ornate cabinetry made the entire space feel outdated. The potential was there, it just need a bit of love.
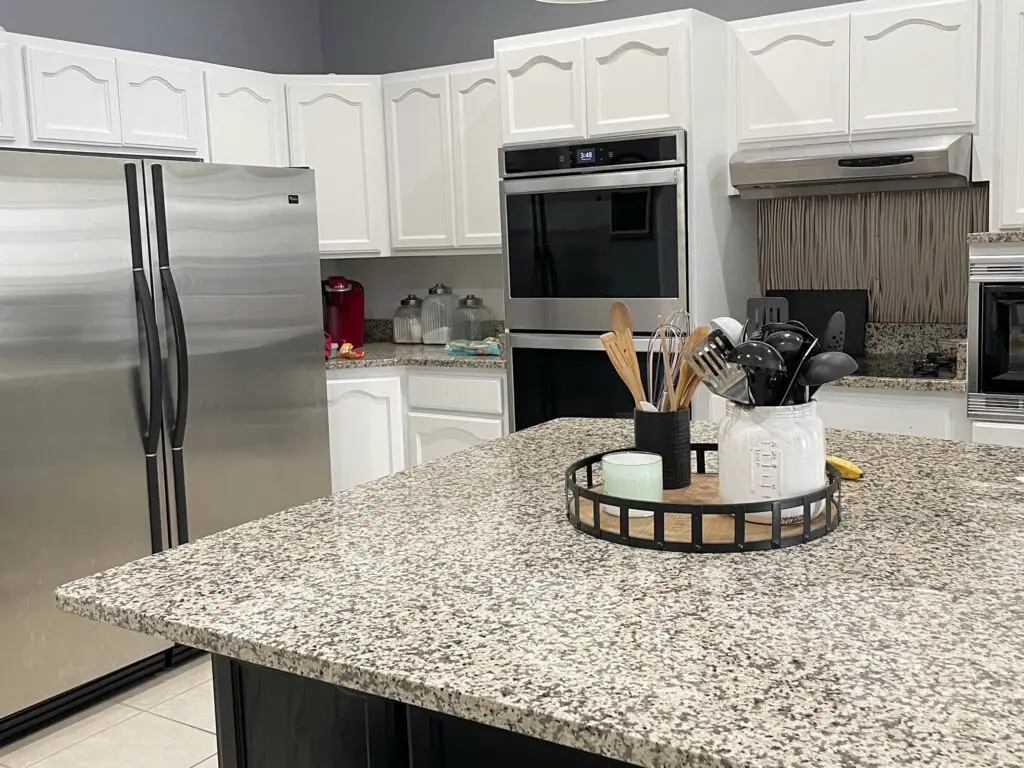
The goal was to transform this well-loved space into a black and white modern farmhouse dream kitchen. We decided to open up the space by painting the bordering cabinetry white while grounding the space with a black island. To keep the transformation budget-friendly, we elected to keep the countertops and only focus on the cabinets and cabinetry hardware.
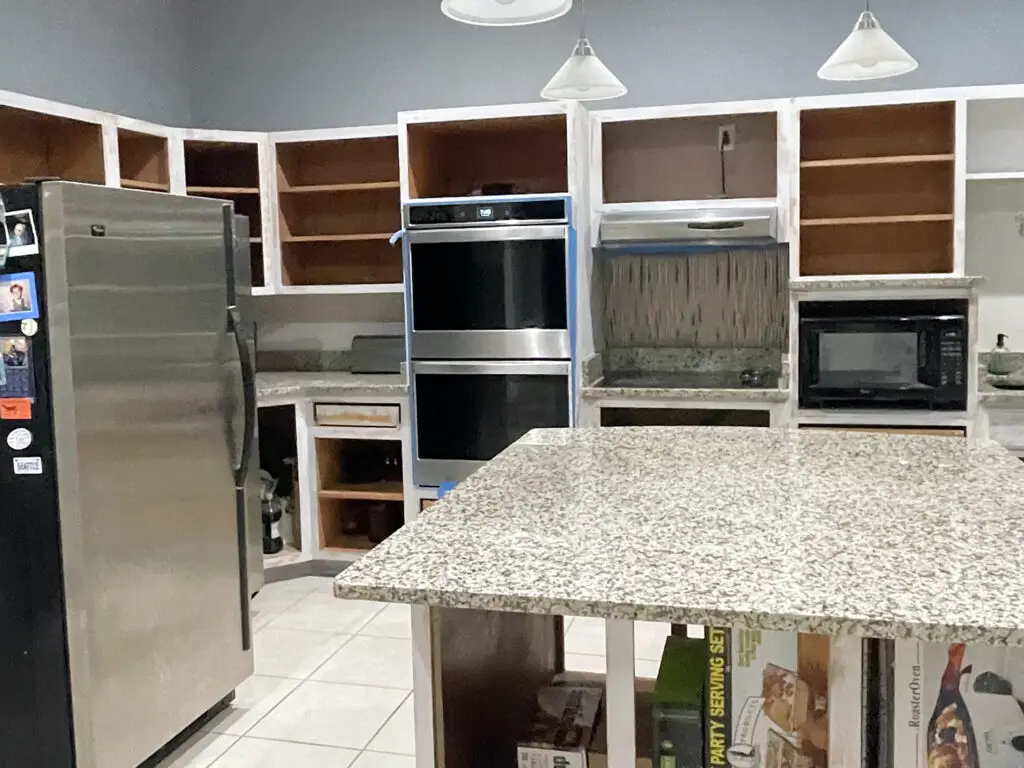
Getting started is the hardest part of updating your cabinetry. You must go cabinet by the cabinet to remove every pull, hinge, and door from each cabinet. Depending on your kitchen this can take quite some time. Once you take the time to remove the cabinets, you must pull everything out of your kitchen. Every last decoration, cup, or straw has to be relocated from your cabinets to somewhere else in your home. We brought in reinforcements to help with this part and I suggest doing the same.
We had to sacrifice the dining room to store the hundreds of cups and mugs we stashed in the kitchen and I was absolutely shocked at how much could actually fit in there. Fortunately, this provided us with the perfect opportunity to decide what could be donated or thrown away. I highly recommend taking the time to do this because I guarantee you won’t want to do it again after this! It also allowed us to reapply new shelving liners and clean out the inside of the cabinets for a fresh start.
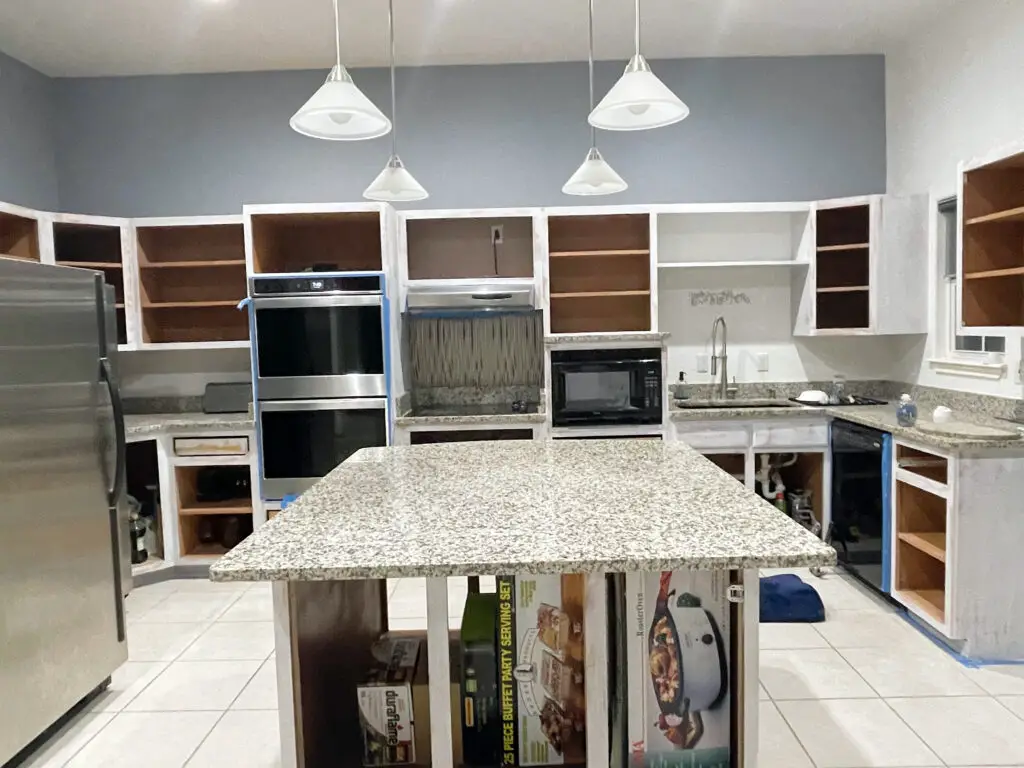
Once everything (well almost everything), was removed from the cabinets we began sanding the wood down. if you have the ability, tarp everything down. The sawdust seems to fly everywhere so I suggest walling off the room with a tarp to avoid spreading the dust to other areas of your home. Once we sanded the cabinetry, we deep cleaned the area and wiped down the cabinets to ensure no sawdust was left trapped in the paint. Then we taped around the floor, counters, appliances, and walls to ensure the paint stayed where it should.
We applied two coats of a base primer before deciding to move a couple of items back into the kitchen. Initially, we thought we may use a sprayer for the paint, but after tossing around costs we decided to hand paint them instead. This meant we could move a few items in boxes back into the cabinets to clear more space in the now overcrowded dining area.
After the primer dried we started painting the frames with tiny paint rollers and paintbrushes for the more precision-based spaces. Although a smidge time-consuming, the painting moved fairly quickly. Knowing the hardware needed an updated we filled the old holes with wood filler before slathering paint on them. Luckily, the cabinetry doors took hardly any time as we could lay them on the ground and cover them quickly with paint!
We completed the white first and then cleaned the brushes and trays for the black. The white took a few coats but the black required only two layers as the rich color easily covered the wood. If you would like to know what paint we used, just comment below.
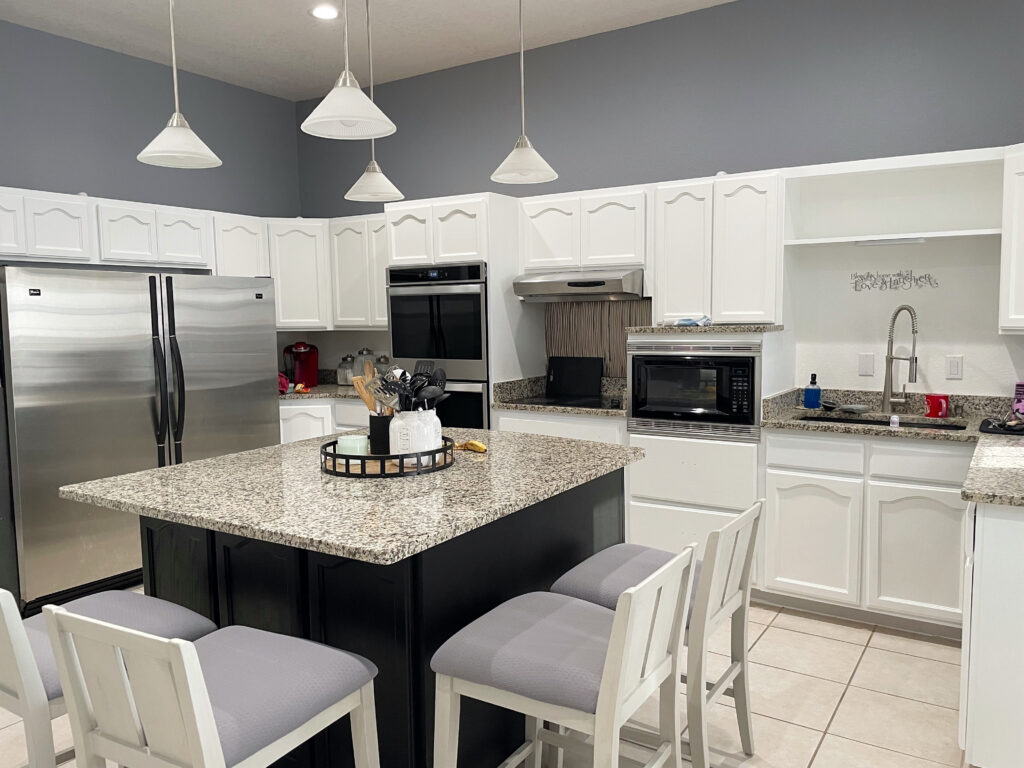
Hanging the doors required a bit of toying to make sure each cabinet hung straight instead of crooked. Once we felt happy with the finished look, we started adding back the kitchen supplies into their new homes. We positioned the barstools and a center tray on the island to help bring the kitchen back together.
The hardware was not yet applied because we are still trying to decide on the perfect ones. We found long black pulls for the white cabinets, but we want to mix in silver hardware for contrast on the black island. Yes, mixing hardware is okay and I love the dual metal tones in the space! Plus, the silver pulls will accent the stainless steel appliances for a cohesive look.
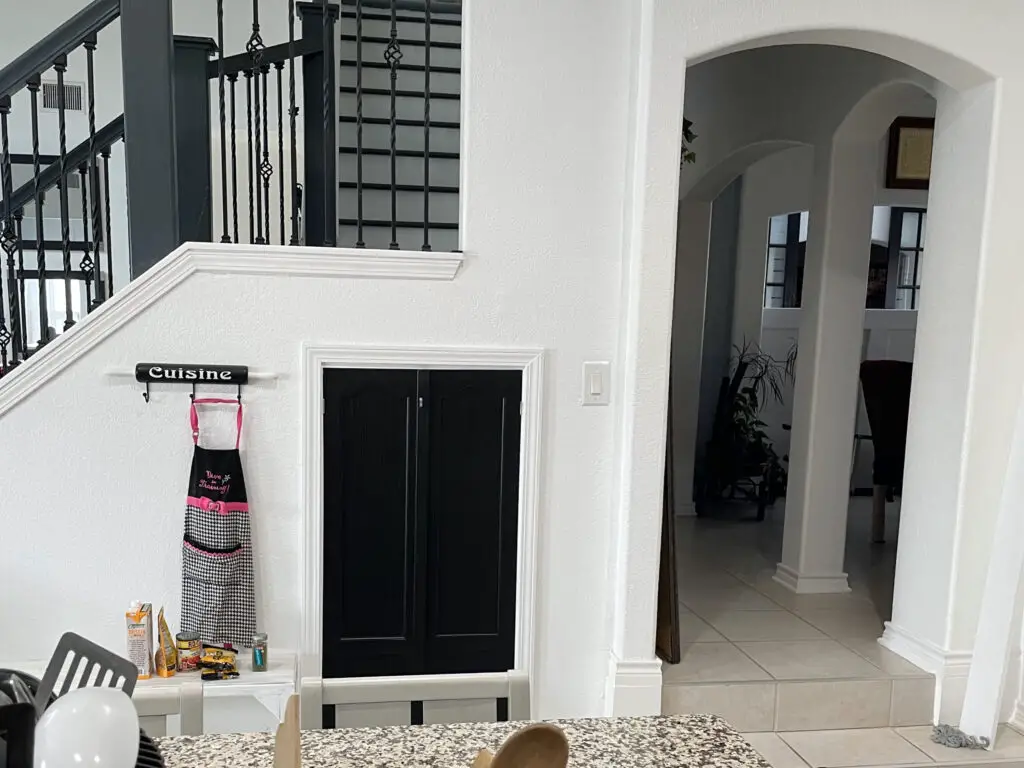
Lastly, we had a little extra black paint and decided to add a pop of black to the stairway wall in the kitchen. We painted the tiny door to our extra storage spot which may be my favorite part of the renovation. I love how it ties the kitchen together with the stairway railing and adds extra pizazz to an otherwise boring white wall. We pulled the white bench from the breakfast room over to the side of the door and hope to add pillows and some baskets for an added comfy touch.
The updated white cabinetry opens up the space and the black island provides a bit of dimension to the room. I love how the bold island ties in the black from the granite counters and updated appliances. We still plan to update the hardware, mix up the flooring, and update the barstools around the island, but I think it looks great so far. I’m excited to share the finished product soon! Tell me what you think of the current progress in the comments below.
